Using This Theme
If you’re here, you probably want to use this theme for your technical documentation or blog. This page will provide an in-depth overview of how to set up everything you need to start writing.
Installing Prerequisites
To start, you’re going to need to install Ruby, Jekyll, and some other necessities. Jekyll already provides excellent installation guides on their website, so follow their steps before moving on.
After you’re done, you need to create a new Jekyll blog. Simply open up the command line and type in jekyll new <path>, where <path> is the directory you want your blog to be stored in.
Once the command is done running, go to the location where you installed a new Jekyll blog. You should see a bunch of files there, that has a structure somewhat like the following:
_posts
_config.yml
.gitignore
404.html
about.markdown
Gemfile
Gemfile.lock
index.markdown
If so, you’ll done with this step! Jekyll has installed everything you need to setup a blog, including the default theme, Minima.
Viewing the Blog
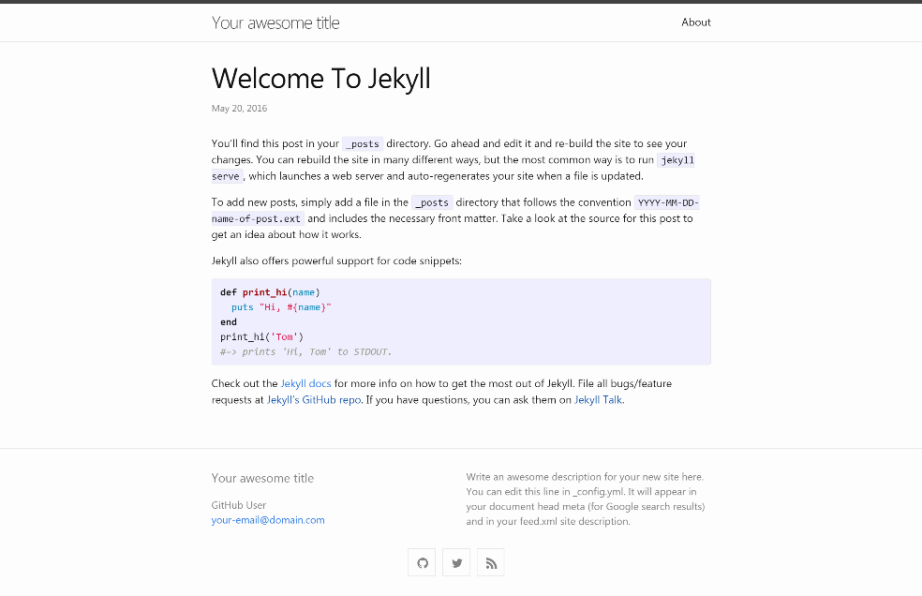
To view your blog, head over to the command line once more and run bundle exec jekyll serve. Scroll through the output, and you should be able to see a link that looks like http://127.0.0.1:4000/. Copy and visit that link, and you should see something that looks like this:
When viewing your blog locally(for example, while you’re writing a draft), you can simply run bundle exec jekyll serve to view your blog locally. It will typically automatically update content for you locally when you edit something.
Switching out the Theme
Now we want to switch the theme to TechDoc. To do so, we need to edit the Gemfile file in your blog directory. This file is used by our blog(Bundler, a installation tool specifically) to update the dependencies.
Open it, and remove a line that looks somewhat like gem "minima", "~> 2.5". This effectively removes the Minima theme. You can then replace it with:
gem "techdoc-jekyll-theme"
We also need to resolve some dependencies for Jekyll, so find a line in the file that looks like gem "jekyll", "~> 4.2.0" and replace it with gem "jekyll".
Once you do that, you’ll need to delete Gemfile.lock, which contains the current dependencies. Since we’ve just edited the dependencies, keeping that file could result in errors that we don’t want.
Afterwards, you’ll need the command line again. Open the command line, and run bundle install, which will take a look at our Gemfile and use it to install new dependencies.
If everything goes fine, you should now have the theme installed. Open _config.yml. This file is used to configure information for our blog, such as theme information, author information, and so forth. Right now, we want to change our theme, so replace the line that says theme: minima with the following line:
theme: techdoc-jekyll-theme
If you’re still running bundle exec jekyll serve, you’ll need to close that by running CTRL+C as Jekyll doesn’t regenerate your blog when you edit _config.yml for technical reasons. Run the command again, and navigate over to your blog.
You should now see that it’s… empty. If you look closely at what the command line is outputting, it will say that some of the layouts you’re trying to use are missing; this is because Minima and TechDoc use different layouts to render a page. To fix this problem, delete about.markdown and open index.markdown. Change it’s header, which looks like this:
---
# Feel free to add content and custom Front Matter to this file.
# To modify the layout, see https://jekyllrb.com/docs/themes/#overriding-theme-defaults

layout: home
---
to something like this:
---
layout: post
---
Refresh your blog again and you should now see a page that resembles this page, but with little to no content.
Configuring Your Blog
By default, _config.yml looks something like the following, with added comments:
title: Your awesome title
email: your-email@example.com
description: >-
  Write an awesome description for your new site here. You can edit this
  line in _config.yml. It will appear in your document head meta (for
  Google search results) and in your feed.xml site description.
baseurl: ""
url: ""
twitter_username: jekyllrb
github_username:  jekyll
theme: techdoc-jekyll-theme
plugins:
  - jekyll-feed
_config.yml can be edited to suit your tastes and fit the theme you have installed, as we saw before. Edit it so that it looks similar to this(but with your information, of course):
author: Jianmin Chen
baseurl: "/techdoc"
github_username: jianmin-chen
library_name: TechDoc
library_link: https://github.com/jianmin-chen/techdoc
library_description: >-
    Jekyll theme for writing technical documentation
url: "https://jianmin-chen.github.io"
theme: techdoc-jekyll-theme
Some of these are self-explanatory, but others need a little bit more explanation. baseurl is the URL after your website URL. For example, url in the above example is https://jianmin-chen.github.io and baseurl is /techdoc, so to visit the blog above someone would visit https://jianmin-chen.github.io/techdoc. You can either add a custom baseurl or remove it if necessary.
As mentioned before, you will need to rerun bundle exec jekyll serve in order to see a updated version of your blog.
Writing Posts
Now we can get to the fun part - writing posts. To do this, you can head over to the _posts folder inside your blog directory and create a new file, titled year-month-day-title.markdown. How you name your file is important because Jekyll will use it to create a link to your file, such as http://127.0.0.1:4000/techdoc/2021/04/01/using-this-theme.html.
Once you name it, you can open it. To start off, we need to include some information about our post, by adding a header. Typically, your header should look like this:
---
title: Post title
layout: post
---
After you’ve set up the header, you can start writing! If you’ve never written in Markdown before, you can find a quick reference here. When you save the file, take a look at your blog - a link should have been added, and you can visit it to see your content! Everything you write and visit will go in the _posts folder.
You might also want to update the home page. Updating the home page is the same as writing a post, but you have to edit index.markdown instead.
Deploying to GitHub Pages
Deploying your static website to GitHub Pages is very simple. First, add a extra couple of lines to your _config.yml file:
plugins_dir:
    - jekyll-remote-theme
remote_theme: jianmin-chen/techdoc
Make sure to also remove theme: techdoc-jekyll-theme, since this can cause issues when GitHub tries to detect the theme to use.
Then, sign up or log in to your GitHub account, and create a new repository. Depending on whether or not you added a baseurl variable to your _config.yml file, you have a couple of options for naming your repository - you can either use the baseurl or <username>.github.io.
Once you’ve set up your repository, you need to get a local copy of the repository. To do so, you need to install Git first. Afterwards, you can open the command line, navigate to the location of your blog, and run the following commands:
git config --global user.name "<your GitHub username>"
git config --global user.email "<your GitHub email>"
git clone https://github.com/<username>/<repository name>.git
These commands set up the GitHub command line. After you clone it, you can run:
git add .
git commit -m "<commit message>"
git push -u origin master
The last step is to head over to your repository’s settings, and turn on GitHub Pages. It’ll ask you for a branch - use master.
Assuming there are no errors, you can visit your blog after you’ve done this, most likely at https://<username>.github.io/<baseurl>. Your blog - or documentation - is now available on the Internet!
After you’ve set up your blog, you’ll probably want to alter it. To do so, you can just run the above commands again, in the directory of your blog(i.e the one you cloned).